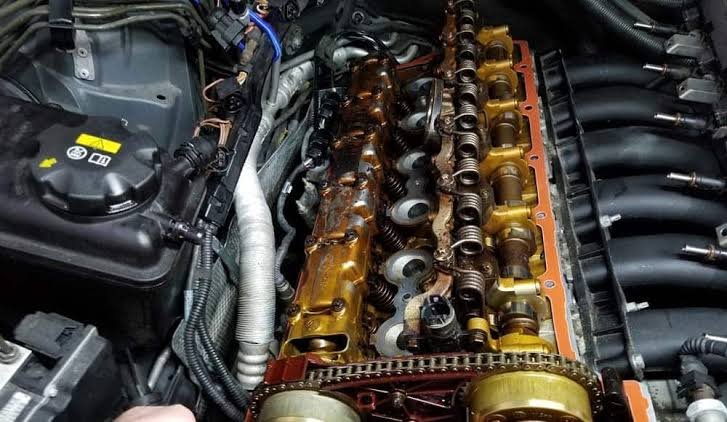
If you own a 2009 BMW X5 xDrive30i with a 3.0-liter engine, keeping it in top-notch condition is crucial. One essential aspect of maintenance involves ensuring the valve cover is properly secured. Improper tightening of the valve cover bolts can lead to oil leaks, reduced engine performance, and costly repairs. This guide will walk you through the 09 BMW X5 xDrive30i 3.0 valve cover bolt tightening sequence, so you can get it right the first time.
Why the Valve Cover Bolt Tightening Sequence Matters
The valve cover protects your engine’s valve train and prevents oil from leaking out. However, tightening the bolts incorrectly—either unevenly or with the wrong torque—can lead to warping, oil leaks, or damage to the gasket. Following the correct tightening sequence ensures:
- Even pressure distribution.
- A secure fit.
- Long-lasting engine performance.
Tools You’ll Need
Before diving into the process, gather the following tools to make the job easier:
- Torque wrench (calibrated for low torque settings).
- 10mm socket or appropriate driver.
- Replacement valve cover gasket (if necessary).
- Clean shop rag.
- Service manual for reference.
The Correct Tightening Sequence for the Valve Cover Bolts
BMW specifies a precise sequence to tighten the valve cover bolts. The goal is to work from the center outward to ensure even clamping pressure. Follow these steps:
Step 1: Start in the Center
Begin with the two bolts closest to the center of the valve cover. These bolts should be tightened first to secure the middle section, preventing the gasket from misaligning.
Step 2: Work Outward in a Crisscross Pattern
Move to the bolts adjacent to the central ones, tightening in a crisscross or star pattern. This ensures even pressure is applied to all parts of the valve cover.
Step 3: Use the Correct Torque Setting
For the 2009 BMW X5 xDrive30i, the valve cover bolts should typically be tightened to 89 inch-pounds (10 Nm). Always use a torque wrench to avoid over-tightening, which can strip the threads or crack the valve cover.
Step 4: Double-Check the Sequence
Once all the bolts are tightened, go over the sequence again to confirm each bolt is secure and tightened to the correct torque.
Helpful Tips for a Smooth Process
- Inspect the Gasket: Replace the valve cover gasket if it shows signs of wear, cracks, or damage.
- Clean the Mating Surface: Ensure the area where the valve cover meets the cylinder head is clean and free of old gasket material.
- Hand-Tighten First: Begin by hand-tightening the bolts to align the cover properly before using the torque wrench.
- Don’t Rush: Take your time to follow the sequence and torque specifications.
Common Mistakes to Avoid
- Skipping the Torque Wrench: Tightening by feel can lead to inconsistent pressure.
- Over-Tightening: This can warp the valve cover or damage the gasket.
- Ignoring the Sequence: Tightening bolts randomly can result in uneven sealing.
Conclusion
Properly securing the valve cover on your 09 BMW X5 xDrive30i 3.0 is essential for maintaining engine health and preventing leaks. By following the correct tightening sequence and using the right tools, you can ensure a snug fit and avoid unnecessary headaches down the road.
FAQs
1. What is the torque specification for the 2009 BMW X5 xDrive30i valve cover bolts?
The torque specification is 89 inch-pounds (10 Nm).
2. Do I need to replace the valve cover gasket every time I remove the valve cover?
It’s highly recommended to replace the gasket if it’s old or damaged to ensure a proper seal.
3. What happens if I over-tighten the valve cover bolts?
Over-tightening can warp the valve cover, damage the gasket, and strip the threads.
4. Can I use sealant on the valve cover gasket?
Typically, sealant is not required for a new gasket. However, check your service manual for specific instructions.
5. How often should I inspect the valve cover bolts?
It’s a good idea to inspect them during regular oil changes or if you notice signs of oil leakage.

